
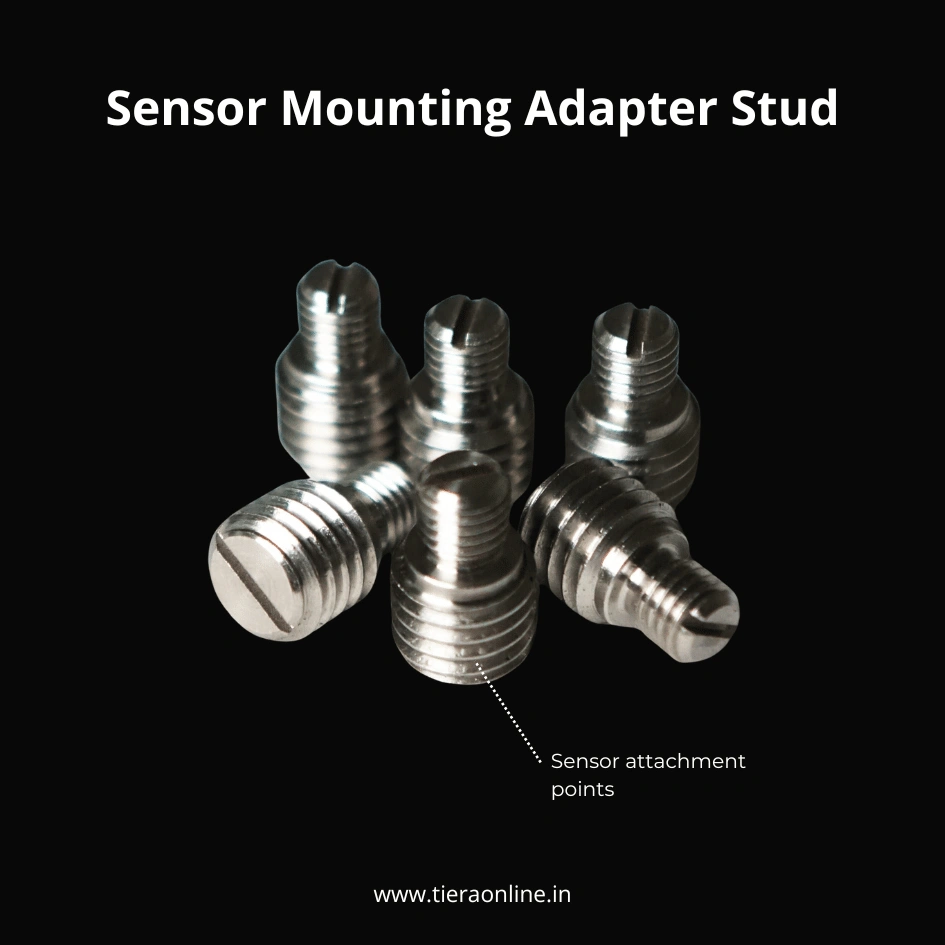
Sensor Mounting Adapter Stud
Indicative price, ex-works. Excludes GST, packing & forwarding, freight, insurance and duties. Request a quotation to confirm.
TM101-1A : TIERA SS304 Adapter Stud for sensor mounting
TM101-1A : TIERA SS304 Adapter Stud for sensor mounting
Description
Read full description
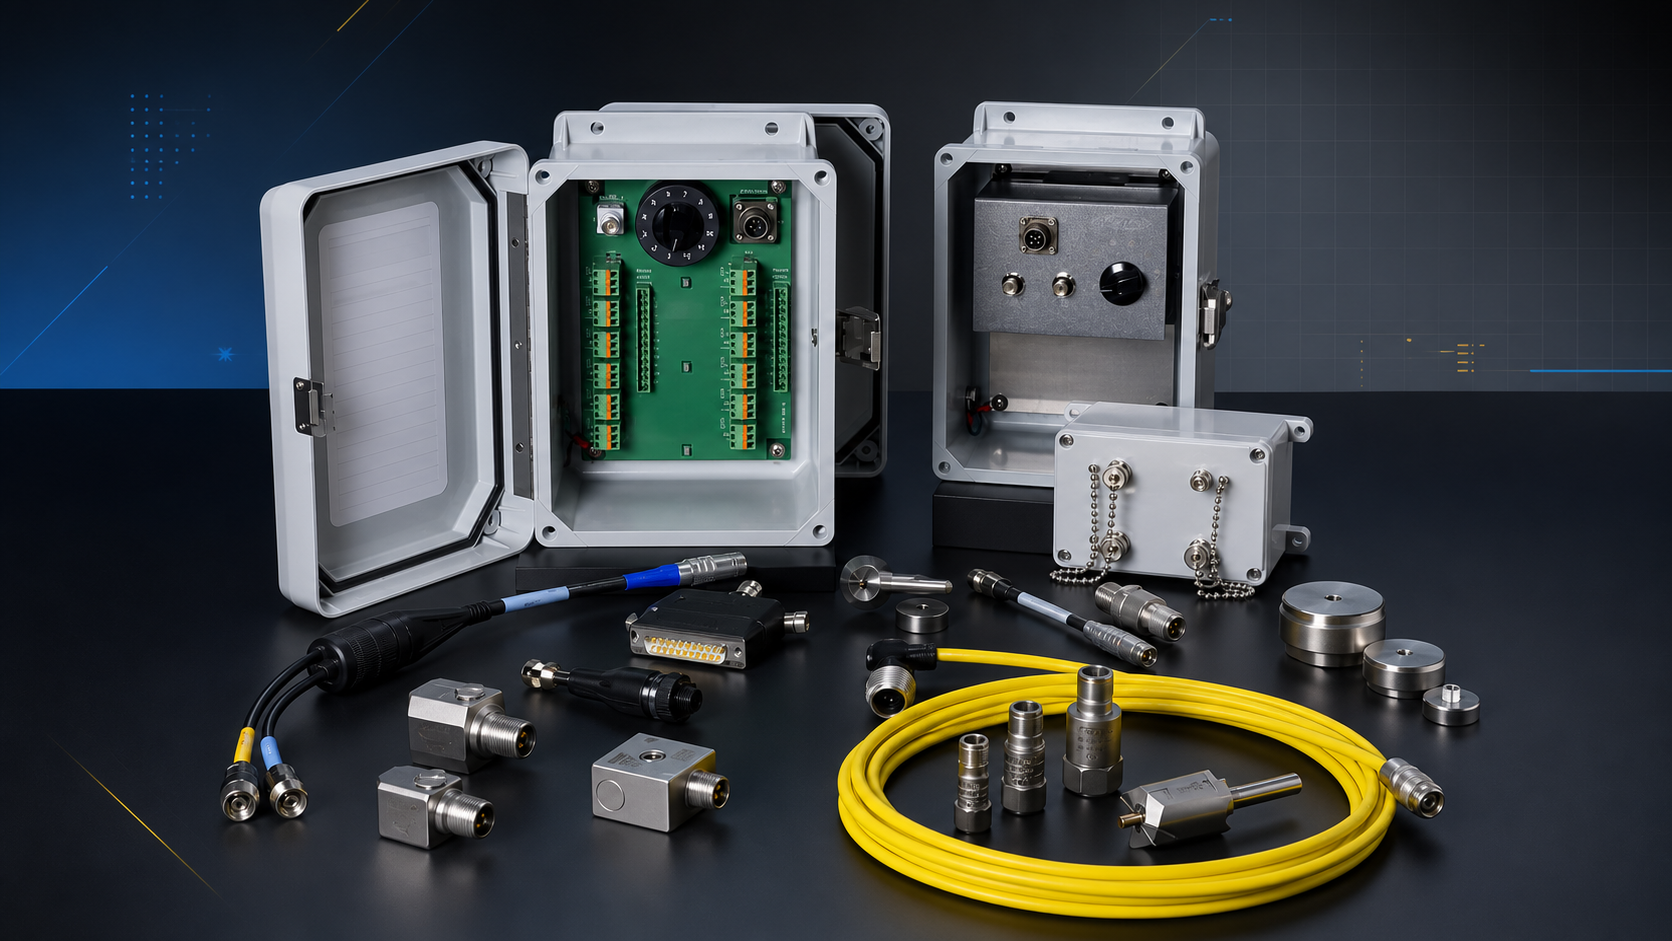
TIERA Accelerometer mounting stud is a specialized component designed to securely attach an accelerometer sensor to a mounting surface or fixture. Here’s some information about it: Threaded Shaft: The mounting stud typically features a threaded shaft on one end. The thread type is usually standardized to match the mounting hole of the accelerometer sensor. Common thread sizes include 1/4″-28, M6, M8,10-32 etc. Head Type: The other end of the mounting stud may have a variety of head types depending on the application requirements. It could be a flat head, a hexagonal head, or a knurled knob for easy installation and removal. Material: Mounting studs are commonly made of materials such as stainless steel, aluminum, or brass. These materials are chosen for their strength, durability, and resistance to corrosion, ensuring reliable performance in various environments. Length: The length of the mounting stud is crucial to ensure proper sensor positioning and alignment. It should be sufficient to accommodate the thickness of the mounting surface and any additional components while providing a secure attachment for the sensor. Compatibility: Accelerometer mounting studs are designed to be compatible with a wide range of accelerometer sensors from different manufacturers. It’s essential to choose a mounting stud with the correct thread size and pitch to ensure a proper fit with the sensor’s mounting hole. Installation: Mounting studs are typically installed by screwing them into the mounting hole of the accelerometer sensor using a wrench or a screwdriver. Once attached, the sensor can be securely mounted to the desired surface using bolts, screws, or other fasteners.
Indicative price, ex-works. Excludes GST, packing & forwarding, freight, insurance and duties. Request a quotation to confirm.
Request a quote
Send this straight to our sales team — pricing, lead time, accessories, or a demo.
Before you buy
The engineering behind this product
Why this measurement is made, how it goes wrong, and what the numbers mean — written by the people who build the instrument.
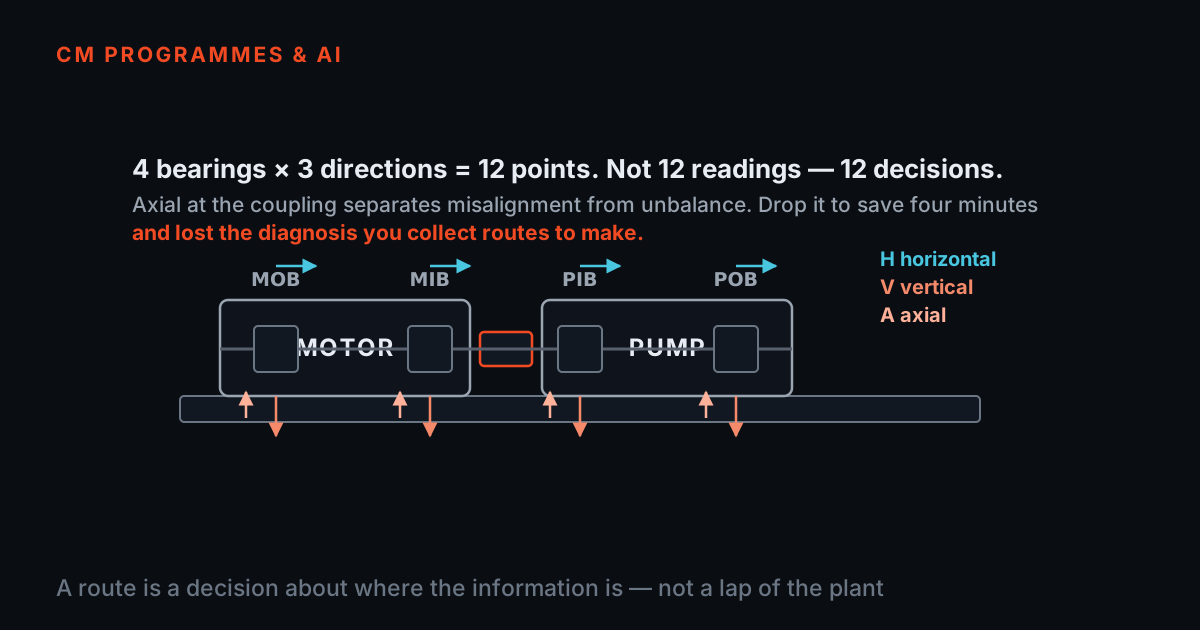 Route-based CMDesigning a Vibration Route: Where to Measure, How Often, and What to Stop CollectingA route that takes four hours and gets walked is worth more than one that takes two days and gets skipped. Most struggling programmes are not short of technology — they are carrying points nobody reads, at intervals nobody chose, on machines nobody ranked.9 min read · Read →
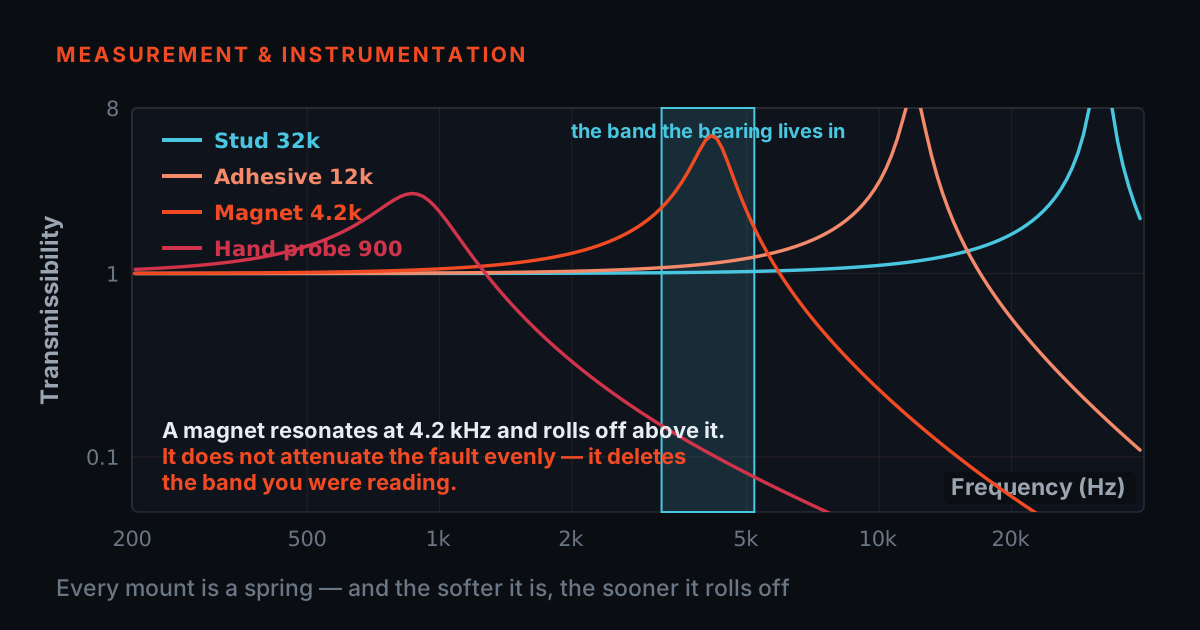 Mounting bandwidthThe Magnet That Deleted a Bearing FaultHow you attach the sensor decides which frequencies you are allowed to see. A mini explainer plus a live simulator: pick stud, adhesive, magnet or probe, drag a fault frequency, and watch an early bearing tone vanish.7 min read · Read →
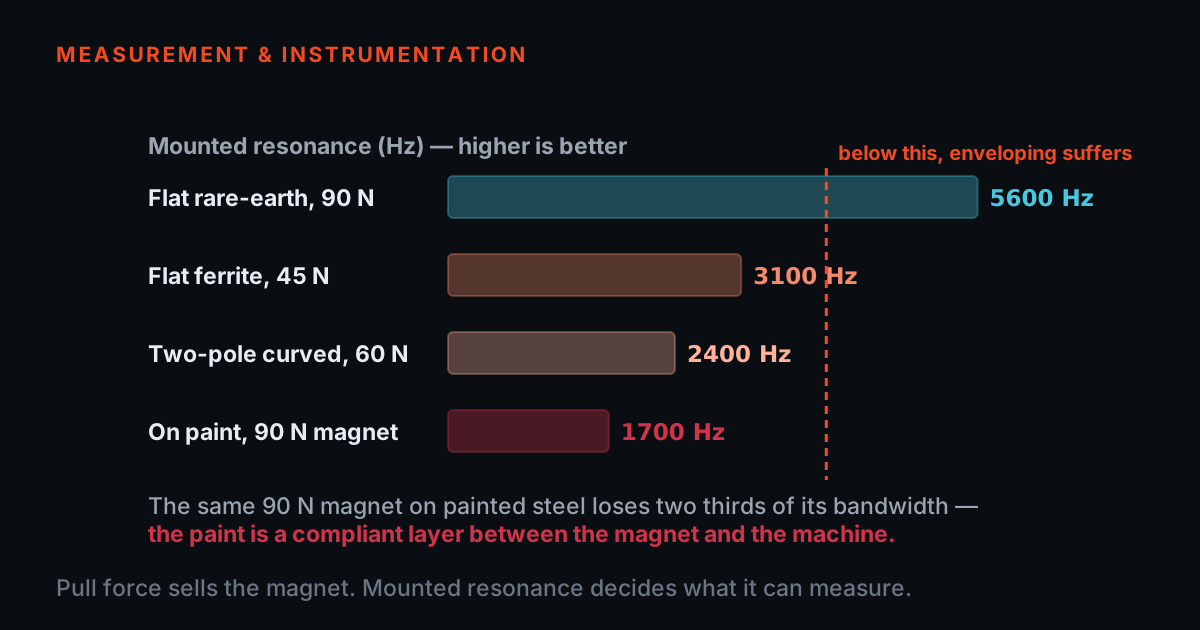 Mount selectionChoosing a Magnetic Mount: Pull Force Is the Easy HalfA magnet is not an accessory — it is the last spring between the machine and your accelerometer. A buyer's guide to pull force, flat versus two-pole curved geometry, surface condition and the five tests to demand, with a live bench that shows a flat magnet on a pipe collapsing your usable band.12 min read · Read →